


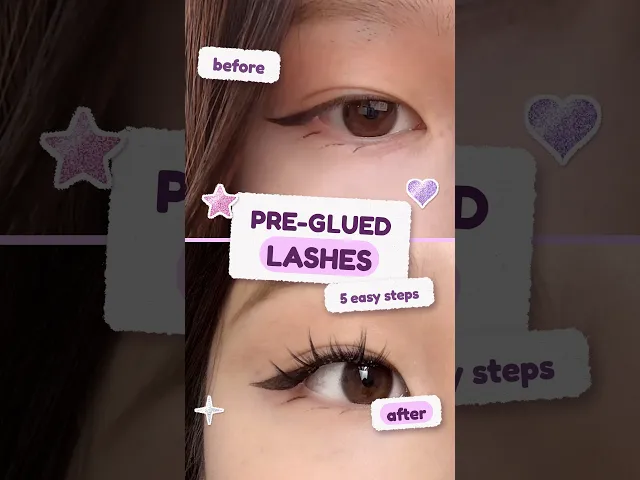
Makeup
How to apply pre-glued lash clusters at home
Five steps, a close-up tutorial and the tools I use.
Affiliate links: I may earn a commission if you shop through my links, at no extra cost to you.
Shop YesStyle ↗
The short answer
My five-step lash routine
Curl, grab your tweezers, pick up a cluster, place it beneath your natural lashes and gently press to secure. Watch the tutorial below for the close-up.
What I used
LuxeFlutter pre-glued lash clusters: the set shown in the video. The original listing is no longer available on YesStyle.
FOCALLURE Eyelash Curler: the curler shown at the start.
Miche Bloomin’ Eyelash Tweezer: the applicator shown in the tutorial.
A mirror: positioned so you can clearly see your upper lashes.
Looking for a lash option now? Gege Bear Glue Free False Eyelashes are an alternative I own. Check the design and application instructions for the set you choose; the result in this video is from LuxeFlutter.
My five-step application routine
1. Curl your natural lashes
I curl my natural lashes first with the FOCALLURE curler. For me, a good curl makes a real difference: it lifts my natural lashes out of the way and creates space for the clusters to curve upwards underneath. If my natural lashes are pointing down, they can push the clusters down too. Use a good curler that fits your eye shape and take your time getting an even, lifted curl before adding any clusters.

Curl first · Illustrated guide. See 0:06 in the video.
2. Get your lash tweezers ready
I use the Miche Bloomin’ applicator in the video, but for beginners I really recommend a lash applicator with soft, rounded tips. I find these easier to use when picking up clusters without crushing or tearing the lashes. Sharp tweezers can poke or injure your eye if your hand slips. Soft tips still need care: work slowly and keep the tool clear of your eye. Have your tray and mirror within reach so you can handle one cluster at a time.

The angled applicator · Illustrated guide. See 0:08 in the video.
3. Pick up one cluster
The angle matters here. Pick up one cluster with its sticky side facing you, as shown in my close-up below. I line the short, curved end of the tweezers along the cluster near its base, so the inside edge supports the cluster across its width. Gently lift it from the tray with that support, rather than tugging on a few lash fibres, which can tear the cluster. Keep the bend of the applicator pointing towards your eye, with the handle extending away from you, ready for the next step. These lashes are pre-glued, so I do not add separate glue.


Pick up one cluster · Illustration followed by my video close-up at 0:12.
4. Place the cluster beneath your upper lashes
I look down towards the mirror with the sticky side of the cluster facing me and the tweezer handle pointing away from my face. The curved tip bends back towards my eye. From below, I bring the cluster up to the underside of my natural upper lashes so the sticky base meets the lash hairs. It attaches underneath the upper lashes, not to the lower lashes. Follow your own set’s placement instructions and keep the adhesive and applicator clear of the waterline and eye surface. Pause the video here to see the angle.

Position beneath the upper lashes · Illustrated guide. See 0:16 in the video.
5. Gently press to secure
Once the cluster is positioned, I gently press it together with the natural lashes using the applicator. Keep the tips clear of your eye and avoid pinching your eyelid. The final close-up shows the finished look.


Gently press to secure · Illustration followed by my video close-up at 0:21.
Does “glueless” mean there is no adhesive?
For the pre-glued clusters in this tutorial, it means the adhesive is already on the lash base. You do not need to apply a separate lash glue. It does not mean adhesive-free, and it is still worth checking the ingredients and instructions before use.
Before you try them
Start with washed hands and clean tools. Follow the instructions supplied with your particular lashes for placement, wear time and removal. This short tutorial shows application; it does not establish how long a set can be worn or whether it can be reused.
If a product irritates your eyes, stop using it. Seek medical advice if irritation persists. The FDA’s eye cosmetic guidance explains these hygiene precautions and why lash adhesives need care.
Shopping on YesStyle
You can shop through my YesStyle link and enter ELLENS20 in the Influencer / Rewards Code box. Check that the discount appears before paying.
For available coupon combinations, visit my YesStyle codes for Australia. If you are ordering for the first time, my YesStyle Australia review covers my experience with the site.
You can find the original video and future tutorials on melovemelon on YouTube.
The practical bits
Quick FAQs
Quick answers to common questions.
Do pre-glued lash clusters need separate glue?
No separate glue is used in this tutorial: the adhesive is already on the cluster base. “Glueless” does not mean adhesive-free. Check that your own set is pre-glued.
Do these clusters go above or below my lashes?
In this routine, they attach to the underside of the natural upper lash hairs. I keep the sticky side facing me, with the tweezer handle pointing away from my face. Keep the adhesive clear of the waterline and eye surface.
Why won’t my pre-glued lashes stay on?
Check the preparation instructions on your pack, including whether your lashes need to be clean and dry. Check that the sticky base is meeting the natural lash hairs and that the adhesive is intact. Avoid adding another glue unless the manufacturer specifically allows it.
How many lash clusters do I need?
There is no fixed number for every eye. Cluster width, lash lengths and the amount of coverage you want all matter. Work with one cluster at a time and check the overall shape in the mirror.
How long do they last, and can I sleep or shower in them?
Wear time and water resistance vary by product. My short video shows application only; it does not verify overnight wear, showering or a multi-day hold for the discontinued LuxeFlutter set. Follow the wear and removal instructions on the set you buy.
Can I reuse pre-glued lash clusters?
Only if your particular set is labelled reusable. Follow its cleaning, storage and reapplication instructions. Do not assume that an adhesive base will work again after removal.

A letter from the Cove
You’re invited.
Beauty discoveries, new stories and a little note from Ellen, delivered to your inbox.